How to root Moto G5s Plus
Welcome Droid's today we're going to show you simple and effective tutorial about how to root Moto G5s Plus. As you all know Moto G5s is a upgraded and more stable version of moto G5 which is launched in august 2017 in India and available worldwide.
These are the basic key features of Moto G5s Plus.
Moto G5s comes with 5.5 inches Full HD display with 13MP camera, 3000Mah Battery & Powerd with Snapdragon 625 processor with 4GB RAM.
Let's begin..
Note:- Rooting android device may void device warranty so proceed with your own risk.
Take full backup to avoid any data loss.
Downloads/Requirements
Steps :-
Comment for queries........
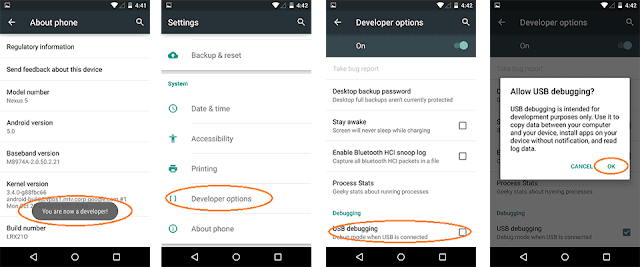
- Enable Developer options from Settings/About phone/Tap build no.5 times.
- Enable USB debugging from Settings/Developer Options/USB debugging.
- Install ADB Drivers & RootKHP to your computer.
- Launch RootKHP application on your PC.
- Connect your device to pc via USB cable.
- Now RootKHP will auto detect your device, if not try reinstalling ADB Drivers.
- As soon as your device gets verified Hit root button from bottom of RootKHP screen.
- Sit back and let RootKHP root your device without any interruption.
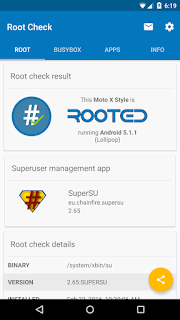
- You'll get following screen if everything goes right.
- That's it.
- You've successfully rooted your Moto G5s Plus.
- Install root checker to verify root access.
Comment for queries........


0 comments:
Post a Comment