Do you have an old computer just sitting around? If you are like me, then you probably have a couple of old PC’s that once ran Windows XP but serve no useful purpose now. Of course, I could always just install and very lite version of Linux on it and call it a day. However, Linux takes a lot of time (compared to Windows) to set up and is a big learning curve for people who are unfamiliar with it. The advantage of using Android as the OS is that you will have the same user experience on your PC just like on your phone. Alternatively, if you are using a Chromebook, installing Android on it will give you far more options than Chrome OS. But then again, if you have a Chromebook, you might as well install Windows 10, but I digress.
The hardware I am using is relatively modest. An Intel Pentium 4 processor with less than 1GB of RAM and a 250GB hard drive. As far as performance, Android runs very smooth on this. There is one minor issue however. The version we are going to be using is an x86 port of Android. This causes an issue with a lot of Android games because a lot of them depend on third party libraries that are only designed for arm. Pretty much,you won’t be able to do any major gaming on your Android PC. But still, Android makes for a surprisingly pleasant desktop OS experience. Here’s how to install Android on PC.
What You Will Need:
- Android x86 iso
- Rufus
- 1 GB Flash Drive
- Computer that is able to boot from Flash Drive
Step 1: Downloading Android x86
The first thing that you need to do is download the Android x86 iso. I provided a direct link to the Kitkat build RC2 which is the latest build at the time of writing this. To see other builds, go to the downloads page.
Step 2: Bootable USB
Using the program Rufus, we are going to create a bootable USB drive. Select your USB drive from the drop-down menu and choose the Android x86 iso file and hit start.
Step 3: Booting from USB
Now on your PC, insert your USB drive. When your computer starts, go into the boot menu. This is usually done by pressing the F12 or Delete button, but could differ depending on your system. Make sure to choose the option to boot from your USB.
Step 4: Installing
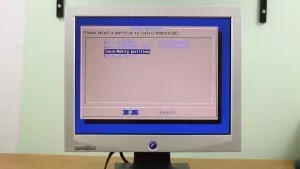
You should now be at the bootloader screen. Select the option to install Androidx86 to hard disk. The next screen will ask you about partitions. Personally, I have no use for Windows XP so I am going to completely format the drive and use the whole thing for Android. Of course, you don’t have to. You can just choose your primary hard drive from the list and make sure not to choose the format option on the next screen.
In my scenario of completely formatting the drive, here’s what I am going to do. Go down to create/Modify partitions. And choose sda.
In the Disk Utility I am going to delete the existing partition then create a new partition (make it the primary). Finally, I am going to change the type to Linux (number 83 on the list) and finally write the partitions out to disk.


Finally, I am going to choose the new partition that I just created. On the next screen, I am going to choose EXT3 as the format.
It’s going to ask if I want to format it, I am going to choose yes.
It’s going to prompt me if I want to install the grub bootloader. I am also going to choose yes.
Choose yes when it prompts for installing the directory as read-write.
Once it’s done, make sure to select reboot.
Step 5: Setting up Android
After you reboot, it should briefly go into the grub bootloader before going right into Android. From this point, you can set it up like you would on any normal phone. One quick note, if it asks you about wifi network and you’re connected via ethernet, just choose to skip the wifi setup. It will still detect your Ethernet connection.
So if you have any questions or comments feel free to leave them below.


0 comments:
Post a Comment